
This is how i edited my final poster to get the misty effect which makes it look more horror.
1. This screen shot shows the image getting duplicated. I took the image that i used for my first draft of the poster and duplicated just in case i made any mistakes i would have the original image still.


3. Then i clicked on saturation and adjusted it so the saturation was 100 so that the image turned black and white.

4.I selected colour burn so that the edge of the image looks darker.And set it to midtones and changed the exposure to 50 percent.

5. Here i have changed the levels of the image.

6. i have then merged the two images together, although i haven't actually done this with this picture this is just an example of what i have done as i don't want to take apart the poster that is already finished.

7.i then created a new canvas which is 6.5 inches by 10 inches and transferred the edited image onto the blank canvas which is filled in black.  8. After this i created a new canvas and used the circular marquee tool with a feather effect of 75 px and then created a circle on the canvas and went to filter then clicked on render and then on the cloud effect . Then i selected the whole image and went to edit and pressed define brush set.
 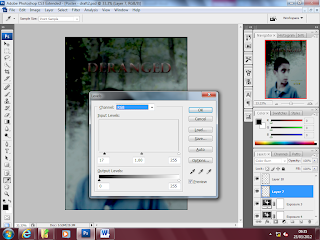 9. Then changed the opacity of the image so that the brush effect blended in with the dark background. Then i adjusted the levels of the image again so that it looks professional.
 8. After this i created a new canvas and used the circular marquee tool with a feather effect of 75 px and then created a circle on the canvas and went to filter then clicked on render and then on the cloud effect . Then i selected the whole image and went to edit and pressed define brush set.
  9. Then changed the opacity of the image so that the brush effect blended in with the dark background. Then i adjusted the levels of the image again so that it looks professional.
  After this i imported the credits that had been edited in fireworks to the poster and placed them at the bottom of the poster based on other posters we had research. i also used the font Trojan pro for the tag line and the date it comes out. This is a classic horror font and clearly represents the genre. A then used the same font for the deranged title as i used in the trailer to ensure consistency. This is how i used phototshop to create the poster. The only improvements i could have made to this i think is to change the date so that it matches with date on the trailer and i think the mist could have been blended in a bit more to the background. But there has been a significant improvement since the first draft we made and our skills with photoshop have also become better as a result.
No comments:
Post a Comment